Are you looking to simplify your business’s online payment process? Razorpay, one of the top payment gateways in India, is the ideal solution for both small businesses and large enterprises.
This guide will walk you through how to create a Razorpay account step by step, so you can start accepting online payments and managing subscriptions effortlessly.
What is Razorpay?
Razorpay is a leading online payment gateway that helps businesses of all sizes accept payments through various methods like credit/debit cards, UPI, net banking, and digital wallets.
Along with payment gateway integration, Razorpay offers multiple tools such as payment links, subscription management, invoicing, and more to streamline your payment processes.
Here’s what Razorpay offers:
- Payment Gateway: Accept payments online via multiple methods including UPI, cards, and wallets.
- Payment Links: Create and share payment links to receive payments without the need for a website or app.
- Subscriptions: Manage recurring payments with ease, perfect for subscription-based businesses.
- Invoices: Send professional invoices and accept payments online directly from them.
- QR Codes: Generate QR codes for both online and offline payments.
Now that you know what Razorpay offers, let’s dive into how you can create a Razorpay account and start using these services.
Step-by-Step Guide: How to Create a Razorpay Account
Step 1: Visit the Razorpay Website
To begin, visit the Razorpay website. This is where you will initiate the Razorpay account setup process. The website is user-friendly, making it easy for new users to navigate and get started.
Step 2: Sign Up for a Razorpay Account
Once on the homepage, click the Sign Up button at the top right corner. Fill in your details such as name, email, phone number, and password.
Before you proceed, make sure to agree to the terms and conditions, then click the Sign Up button to complete your Razorpay registration.
Step 3: Complete Your Business Profile
After logging in, the next step is to complete your business profile. Razorpay will require details such as your business name, address, type (e.g., sole proprietorship, private limited, etc.), and more.
Providing accurate information is crucial, as it will be used in the next step for KYC verification.
Step 4: KYC Verification Process
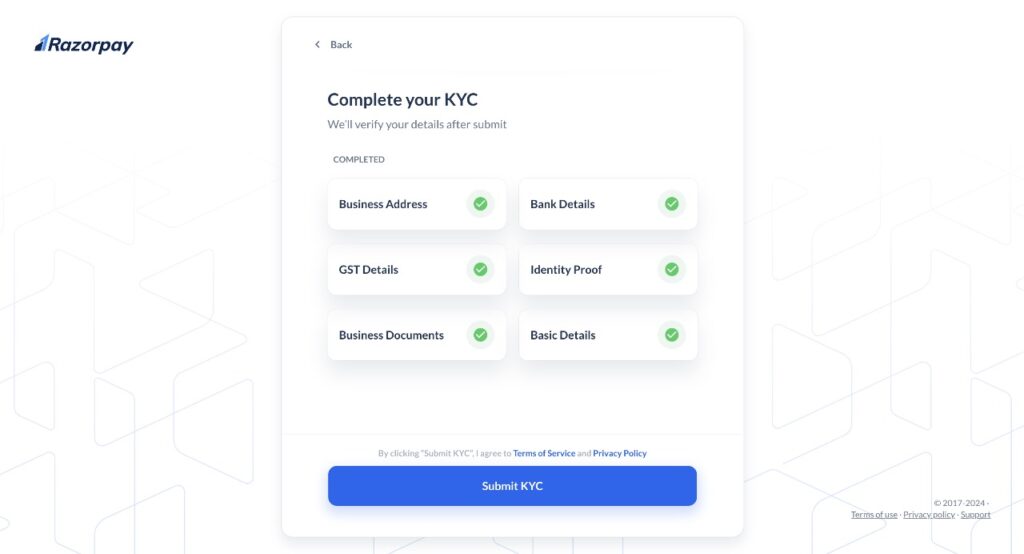
To fully activate your account and begin accepting payments, you must complete the Razorpay KYC verification.
The Know Your Customer (KYC) process ensures that your account is secure and compliant with legal requirements.

- Initiate KYC: Start the KYC process from your dashboard.
- Upload Documents: You will need to upload documents like your PAN card, business registration certificate, and address proof.
- Submit for Review: Once you’ve uploaded all the necessary documents, submit them for review.
The KYC process usually takes a few days to complete, and Razorpay will notify you once your account is verified.
Step 7: Integrate Razorpay with Your Website or App
After KYC verification, you’ll receive your Razorpay API keys, which are needed to integrate the payment gateway with your website or app.
Razorpay provides detailed documentation to help you with the payment gateway integration process, making it simple for businesses to connect their site and start receiving payments.
Step 8: Test Your Setup and Go Live
Before going live, it’s important to test your payment integration. Razorpay provides a sandbox environment where you can conduct test transactions to ensure everything is working smoothly.
Once you’re satisfied with the setup, switch to live mode, and your Razorpay account will be ready to accept real payments.
Tips and Best Practices for Setting Up a Razorpay Account
- Ensure Document Clarity: When submitting documents for the Razorpay KYC verification process, make sure they are clear and easy to read. This will help avoid any delays.
- Double-check Business Information: Ensure all your business details are accurate before submitting them for verification. Mistakes could cause issues later.
Explore Razorpay Features: Apart from just accepting payments, Razorpay offers additional services like subscription management, invoicing, and RazorpayX for banking needs.
Take advantage of these tools to streamline your business operations.
Conclusion: Start Accepting Payments with Razorpay
Setting up a Razorpay account (Link for Sign Up) is a straightforward process, and by following the steps outlined in this guide, you’ll be ready to accept payments online in no time.
Razorpay’s features, from payment links to business banking through RazorpayX, offer everything you need to manage payments efficiently.
Whether you’re running a small business or a large enterprise, Razorpay makes handling payments hassle-free.
Now that you know how to create a Razorpay account, you can start optimizing your business operations and providing your customers with a seamless payment experience.


