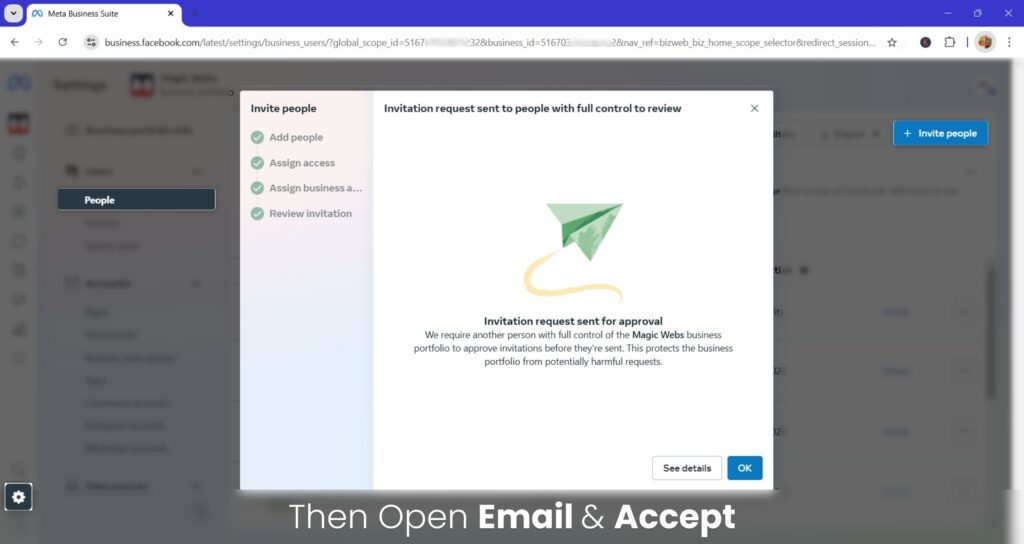
Meta Business Suite is a powerful tool for managing your Facebook and Instagram business assets in one place. Whether you’re granting access to team members or linking a Facebook page, here’s a step-by-step guide to get it done.
Step 1: Access Meta Business Suite
- Open your browser and go to the Meta Business Suite.
- Log in with the Facebook account that has admin access to the business portfolio.
Step 2: Select the Business Portfolio
- Once logged in, navigate to the Business Portfolios section.
- Select the business profile or portfolio to which access needs to be granted.
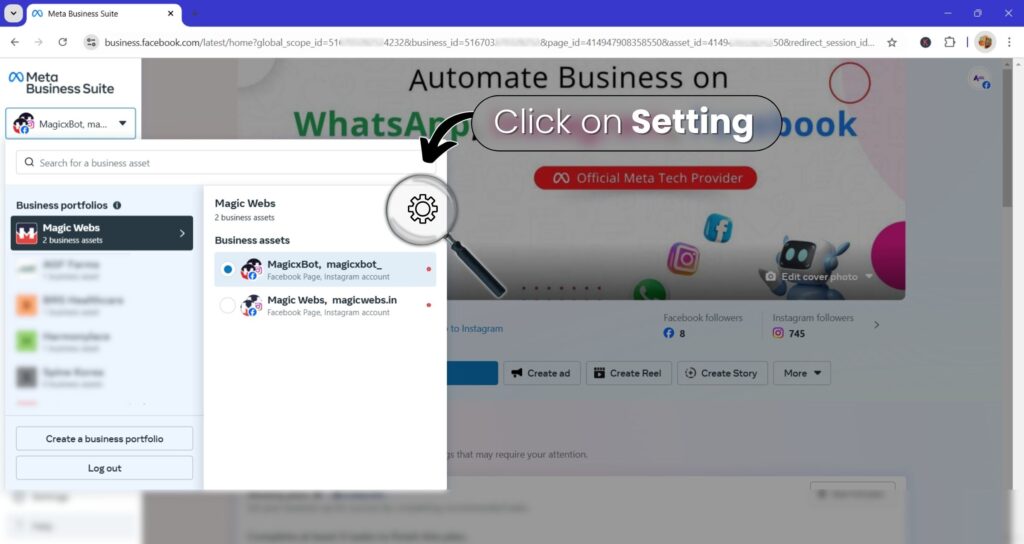
Step 3: Go to Settings
- Click on the Settings icon located in the left-hand menu.
- Under settings, you’ll find various options to manage your business assets and permissions.
Step 4: Add Users
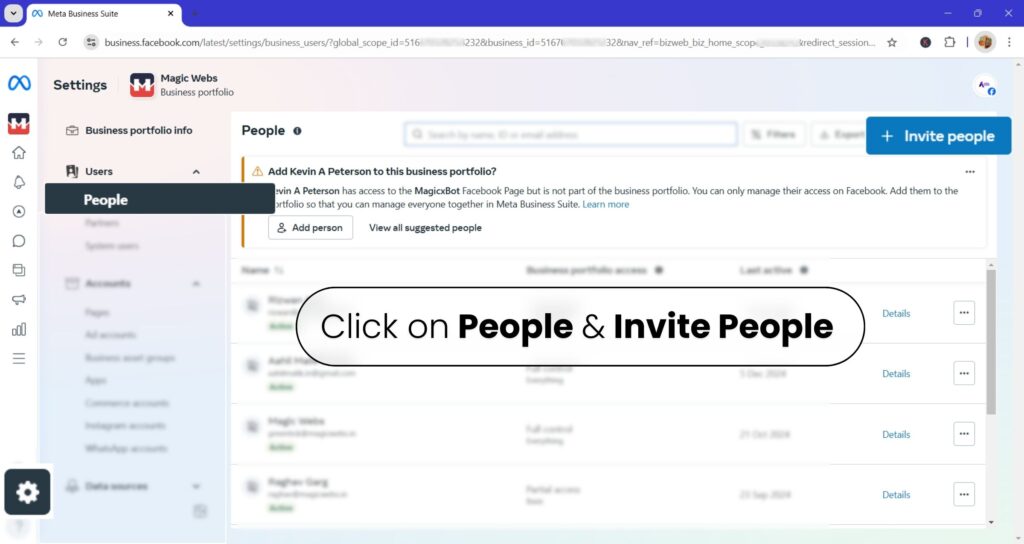
- In the Settings menu, click on Users and select People from the dropdown.
- At the top-right corner, click the Invite People button.
Step 5: Invite a User
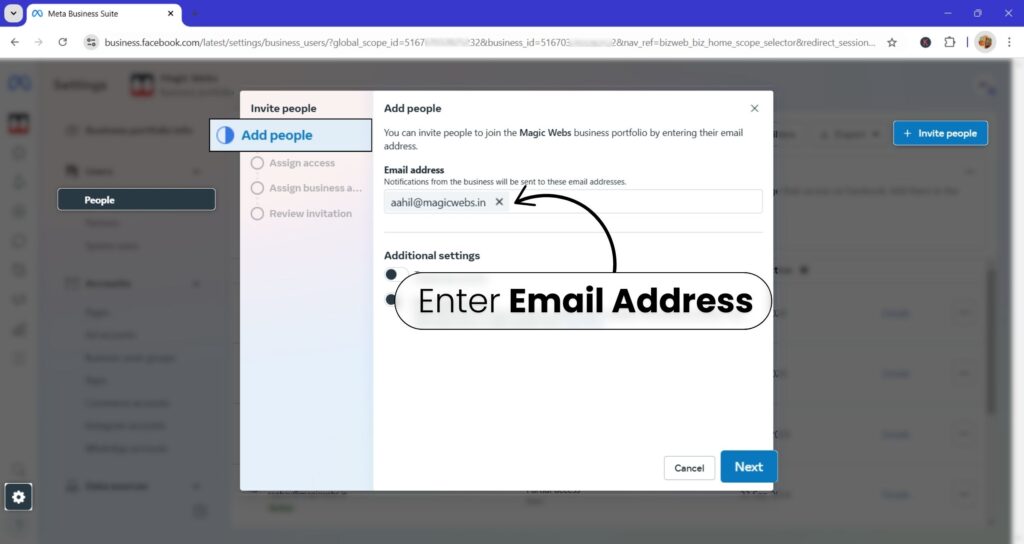
- Enter the email address of the person to whom you want to grant access.
- Click the Next button to proceed.
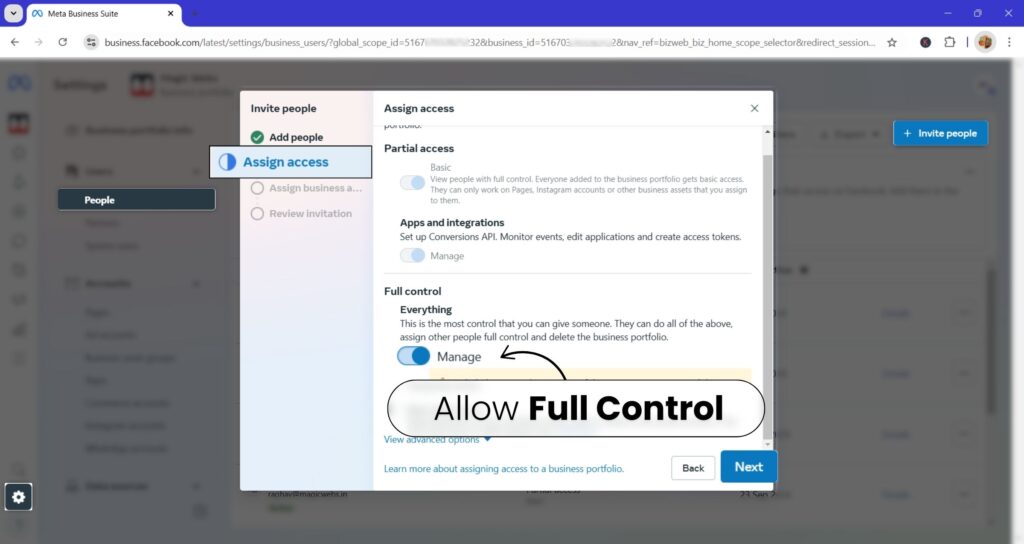
Step 6: Assign Access
- Under the Assign Access section:
- Select the checkbox for Full Control Access to ensure they have complete access to manage the business assets.
- Click Next to continue.
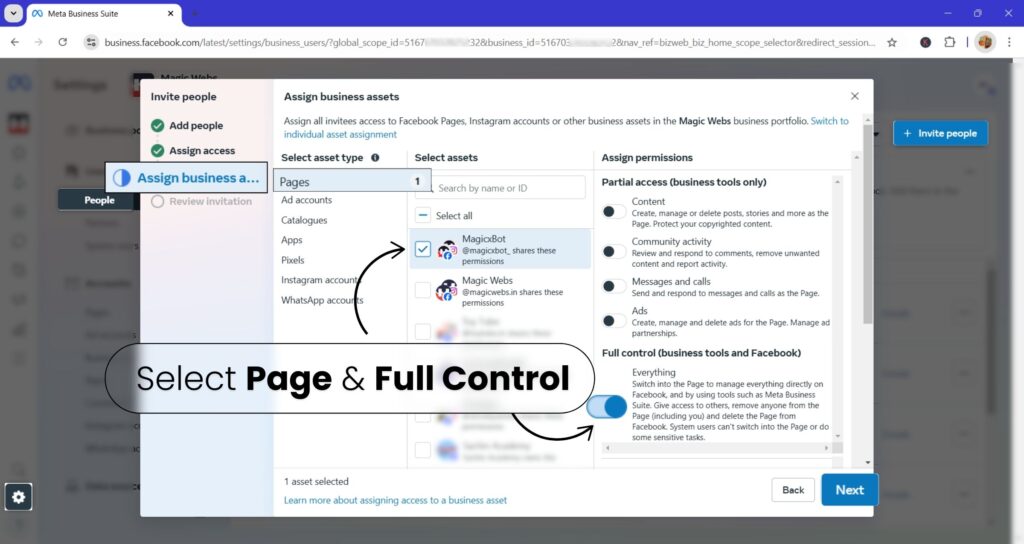
Step 7: Assign Business Assets
- In the Assign Business Assets section:
- Choose the type of assets (e.g., Facebook Pages, Ad Accounts, Catalogs) you want to share access to.
- For each selected asset, grant Full Control Access by ticking the appropriate box.
- Click the Next button.
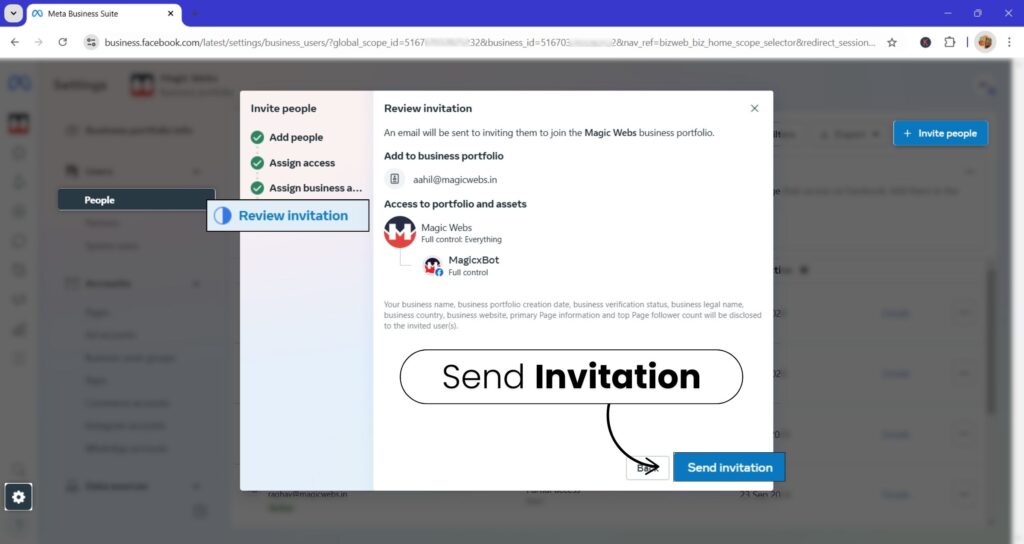
Step 8: Send the Invitation
- Review the details of the invitation.
- Click the Send Invitation button to finalize the process.
Step 9: Accept the Invitation
- The invited user will receive an email with a link to accept the access.
- Once they accept, they will have access to the specified business assets within the Meta Business Suite.
